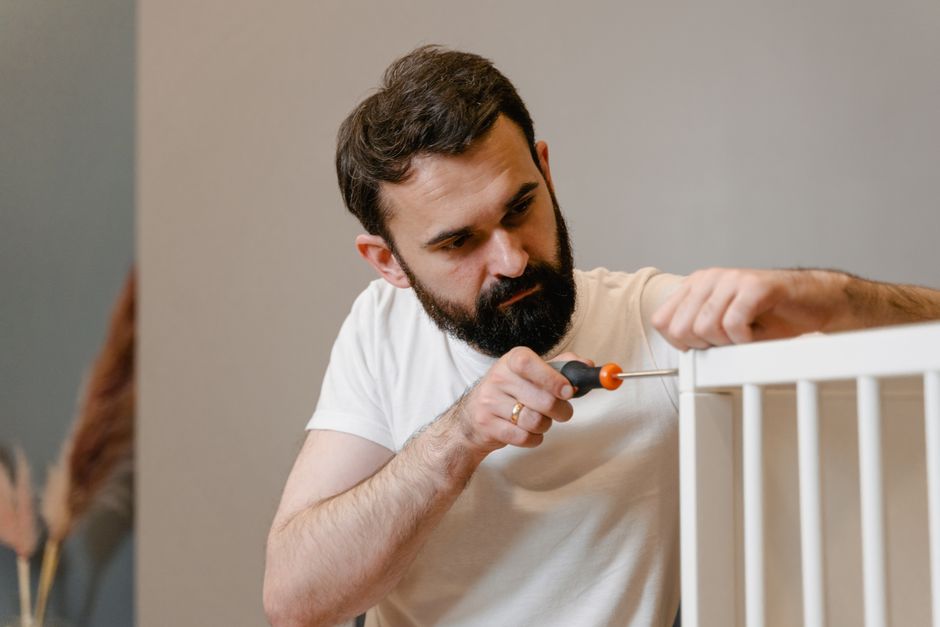
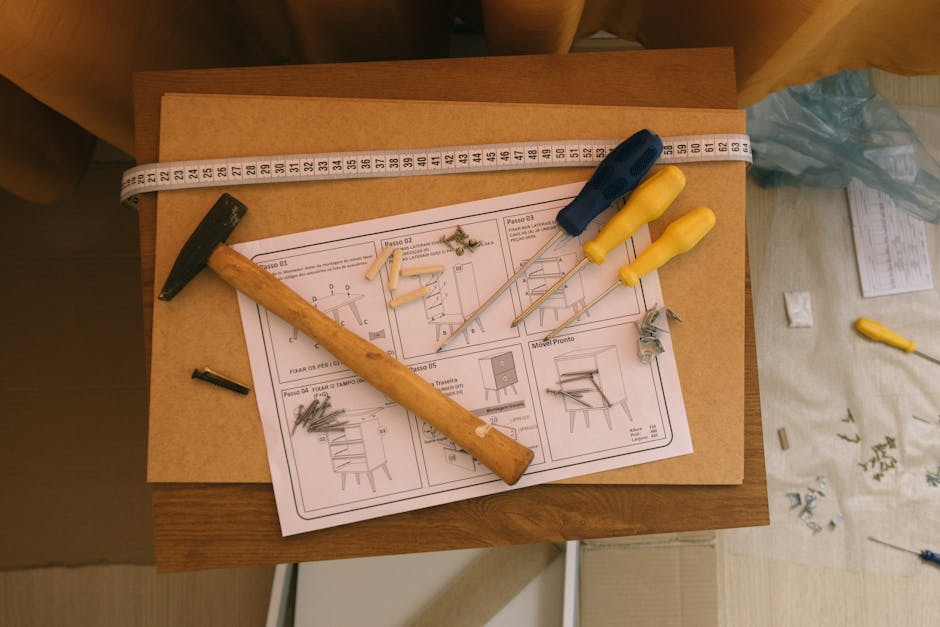
How to Dismantle and Reassemble Flat-Pack Furniture Safely
Flat-pack furniture looks simple on day one. Then moving day arrives, the Allen key goes missing, one screw is hiding under the sofa, and suddenly that "easy assembly" feels a lot less cheerful. If you're trying to work out How to Dismantle and Reassemble Flat-Pack Furniture Safely, the good news is that it's very manageable with the right order, a bit of patience, and a sensible approach to keeping parts organised.
This guide walks you through the process from start to finish: what to remove first, how to label and protect components, how to avoid stripping fixings, and how to put everything back together without wobble, cracked panels, or a small domestic argument. We'll also cover when it makes sense to do it yourself, when to ask for help, and what to check if the furniture has to survive a house move, stairwell, or van journey in the rain. Truth be told, a lot of the stress comes from rushing.
If you're planning a move or need a hand with larger items, it may also help to look at home moves, man and van services, or practical support such as packing and unpacking services. For bigger furniture collections or clearance jobs, furniture pick-up can be useful too.
Table of Contents
- Why it matters
- How the process works
- Key benefits and practical advantages
- Who this is for and when it makes sense
- Step-by-step guidance
- Expert tips for better results
- Common mistakes to avoid
- Tools, resources and recommendations
- Law, compliance, standards, or best practice
- Options, methods, or comparison table
- Case study or real-world example
- Practical checklist
- Conclusion
- Frequently asked questions
Why How to Dismantle and Reassemble Flat-Pack Furniture Safely Matters
Flat-pack furniture is designed to be built by ordinary people, but that doesn't mean it can be taken apart carelessly. Many items rely on dowels, cam locks, composite panels, and hidden joints that only work properly when the parts are aligned in a very specific way. Pull at the wrong point and you can split the board, bend a connector, or weaken a fixing so it never feels quite right again.
Safety matters for two reasons. First, there's the furniture itself. Wardrobes, beds, shelving units, desks, and TV stands can be surprisingly awkward once partially dismantled. Edges become sharp, heavy panels can shift suddenly, and particleboard can crumble if a fastener is forced. Second, there's you. A wardrobe side panel sliding onto a foot is not exactly a glamorous moving-day story.
It also matters because reassembly is where many people get stuck. They know how to unscrew things, but not how to preserve the order of parts, protect the finish, or keep fixings matched to the correct panel. In our experience, the difference between a clean rebuild and a frustrating one is often a set of tiny habits: taking photos, bagging screws properly, and refusing to rush the first 10 minutes.
If the furniture is part of a larger relocation, keeping the whole move organised can help avoid damage. Services such as house removalists or a dependable removal truck hire can reduce the risk of panels bending in transit or fittings getting lost in the shuffle. That's especially useful on a wet London morning when everything seems to happen at once.
How How to Dismantle and Reassemble Flat-Pack Furniture Safely Works
The process is simple in principle: document, remove, label, protect, transport, and rebuild in reverse. The careful part is doing each step without damaging the structure or mixing up the hardware. Most flat-pack furniture is made with assembly-friendly systems, but those same systems can be unforgiving if you pull on them from the wrong angle.
Think of it like a reverse puzzle. Before a single screw comes out, you want to understand how the item holds together. Is it cam-and-dowel construction? Is the back panel stapled on? Are shelves fixed with dowels and confirmat screws? Does the item need to stay upright while certain pieces are removed? A quick look now can save a lot of cursing later. Let's face it, nobody enjoys reassembling a wardrobe twice.
Safe dismantling usually follows a few principles:
- Start with loose parts such as shelves, drawers, doors, and detachable feet.
- Work from the top down where possible, unless the design suggests otherwise.
- Keep each hardware set together in labelled bags or containers.
- Protect finished surfaces with blankets, cardboard, or foam.
- Do not force joints that should separate only after fasteners are fully removed.
Reassembly is the mirror image, but with extra patience. The furniture needs to be square, level, and supported while fixings are tightened. If you overtighten, you can strip the board; if you under-tighten, the whole unit may wobble. Neither is ideal, obviously.
Key Benefits and Practical Advantages
There's a reason careful dismantling is worth the effort. It can make moving easier, protect your furniture, and reduce the chance of awkward damage in narrow hallways or stairwells. A fitted-looking wardrobe may not look like much on a website, but once it's halfway down two flights of stairs, every centimetre matters.
Better protection during transport
Flat-pack furniture often travels better in flat sections than as a full assembled item. Panels are easier to wrap, easier to carry, and less likely to suffer sudden stress points. A dismantled bed frame, for example, is far less likely to twist in a van than one dragged out in a half-assembled state.
Less risk of injury
Large, awkward items can trap fingers, bruise shins, or topple if not handled properly. Taking items apart in a controlled order reduces the chance of surprise movements. It also means you're not trying to wrestle a bulky item through a doorway while the legs are catching on the frame.
Cleaner reassembly
Good organisation means less hunting for screws on the floor and fewer "where does this bit go?" moments. A tidy process also helps if you need to rebuild furniture in a different room, a storage unit, or a new property after a full move.
Better value for money
Keeping furniture in good condition matters if you plan to reuse, sell, or donate it later. A well-maintained piece is easier to pass on, and if you're clearing out items, a service like recycling and sustainability may be relevant when an item can't be reused.
Expert summary: The safest flat-pack furniture moves are rarely the fastest ones. The winning formula is simple: document everything, keep hardware organised, move parts carefully, and rebuild slowly enough to check alignment at each stage.
Who This Is For and When It Makes Sense
This process is useful for homeowners, tenants, landlords, office managers, students, and anyone moving into or out of a property with self-assembled furniture. It's also handy if you need to fit a bed frame through a tight stairwell, replace a damaged panel, or temporarily store furniture between addresses.
It makes sense to dismantle flat-pack furniture when:
- the item is too large to move safely assembled;
- there are narrow turns, stairs, or lifts involved;
- you need to protect the item from scratches in transit;
- the piece is going into storage;
- you want to relocate furniture between rooms or homes;
- the manufacturer's design clearly expects disassembly for movement.
Sometimes, though, dismantling is not the best choice. Very old flat-pack furniture can be fragile, especially if the particleboard has been assembled and disassembled several times already. In that case, it may be safer to move it in one piece if it's still structurally sound, or replace it rather than risk making a weak item worse.
If the move is business-related, you may also want to look at commercial moves or office relocation services, particularly where desks, storage units, and partition-style furniture need careful handling.
Step-by-Step Guidance
Here's a practical process you can follow. It works for most wardrobes, beds, desks, shelving, and drawer units, though you should always adapt it to the furniture type and manufacturer instructions where available.
1. Prepare the space
Clear the floor around the furniture. You want room to kneel, lay out parts, and place removed panels safely. If possible, put down a blanket or dust sheet. That stops scratches and gives you somewhere clean to sort hardware.
2. Gather your tools and containers
Before you start, make sure you have screwdrivers, an Allen key set, bags for fixings, masking tape, a marker pen, and protective wrapping. A phone camera is honestly one of your best tools. Photos beat memory every time, especially once you've handled six similar-looking screws.
3. Photograph the furniture from every angle
Take pictures of the whole unit, the back, underside, inside shelves, hinges, runners, and any cable openings or brackets. Close-up photos of fixings are especially helpful. If a drawer runner looks odd to you now, it'll look even odder when it's on the floor in pieces.
4. Remove loose parts first
Take out drawers, shelves, doors, and detachable accessories. If the furniture has glass sections or mirrors, wrap those immediately and store them upright, not flat, unless the manufacturer says otherwise. Flat glass can be vulnerable if something rests on it.
5. Label parts as you remove them
Use masking tape to mark each panel with a simple code: "left side", "top", "back", "shelf 1". Keep each screw set in a separate bag with the same label. You don't need a spreadsheet. A simple system is usually enough. Keep it simple. That's the trick.
6. Release fixings carefully
Remove cam locks, screws, and dowels in the order that keeps the structure stable. If a panel is still supporting weight, ask someone to steady it. Never pull a board free while a hidden fixing is still engaged. If something resists, stop and check from the other side.
7. Separate large panels with control
Once fixings are out, lift panels straight and gently. Don't twist them if you can avoid it. Particleboard edges can chip if they catch. For large wardrobes and bed frames, two people is usually the sensible choice. One person can do it alone, sure, but there's a difference between possible and wise.
8. Protect and wrap each component
Cover finished surfaces with blankets, bubble wrap, or cardboard sheets. Tape wrapping securely, but not directly on delicate surfaces if the adhesive might leave marks. Put heavier items at the bottom of the load during transport and avoid placing anything on a curved or unsupported panel.
9. Keep all hardware together
Place screws, pins, cams, and brackets in clearly labelled bags. Put those bags in one larger container so nothing drifts off during the move. It sounds basic, but this is where many people lose time. One missing cam lock, and the whole afternoon starts looking silly.
10. Reassemble in the reverse order
Lay all parts out before starting. Compare them with your photos. Build on a level floor if possible, and only fully tighten fixings once everything is aligned. Start by hand-tightening, check the square, then secure fully. Doors and drawers usually need final adjustment after the main frame is stable.
Expert Tips for Better Results
A few small habits make a big difference. They're not fancy, just practical. And in this kind of job, practical beats clever every time.
- Use a parts tray: a muffin tin, old takeaway tub, or egg box can keep tiny fixings sorted.
- Number the bags: if one unit has multiple sections, label hardware bags in sequence.
- Mark hinge positions: a pencil mark before removal can save you a lot of guesswork later.
- Don't over-tighten: hand-tight plus a little more is often enough for many flat-pack fixings.
- Check the back panel: this is often what keeps a unit square. If it's damaged or missing, the whole item may sway.
- Keep an eye on moisture: damp floors, rain-soaked wraps, or condensation in storage can weaken particleboard fast.
One small but useful tip: keep a short written note with the furniture name, room, and number of bags. If you're moving several items at once, that tiny note saves confusion later on. Sounds obvious. Still gets missed.
If you're arranging transport, a service such as man with van or moving truck support can make it easier to keep dismantled panels upright and protected. For bulkier jobs, removal truck hire may be a better fit.
Common Mistakes to Avoid
Most damage happens in the first five minutes or the last ten. That's the annoying bit. Here's what to watch out for.
- Skipping photos: memory fades, especially once pieces look nearly identical.
- Mixing hardware: not all screws are interchangeable, even if they look it.
- Forcing cam locks: if they don't turn smoothly, something is misaligned.
- Lifting panels alone: one sudden slip is enough to chip a corner or strain your back.
- Ignoring the manufacturer's order: some items must be dismantled in a specific sequence.
- Reassembling on an uneven floor: a slightly warped base can make doors misalign and drawers stick.
- Throwing away "extra" parts too quickly: many flat-pack kits include spare screws for a reason.
Another common issue is stripping the board by overtightening. Once that happens, the fixing hole can become loose and unreliable. You can sometimes repair it with a suitable wood filler or insert, but prevention is far easier. Honestly, a slow final turn is better than a dramatic snap.
Tools, Resources and Recommendations
You do not need a van full of specialist gear. Most jobs can be handled with a modest set of tools and a bit of organisation.
| Tool or item | Why it helps | Best for |
|---|---|---|
| Phillips screwdriver | Removes many common screws and hinge fixings | General dismantling and reassembly |
| Allen key set | Fits the hex bolts found in many flat-pack systems | Beds, tables, wardrobes |
| Masking tape and marker | Labels panels and hardware bags clearly | Organisation and reassembly |
| Zip bags or small tubs | Keeps fixings together by section | Preventing lost parts |
| Moving blankets | Protects surfaces from scuffs and chips | Transport and storage |
| Phone camera | Records the original layout and joint positions | Reference during rebuild |
For people moving a full household, it may also make sense to use a broader service like home moves so the furniture is handled alongside boxes and appliances in a more controlled way. If you're only moving selected items, pricing and quotes is worth checking so you can compare options before you commit.
And if you're clearing out older furniture rather than relocating it, it can be useful to review the company's approach to recycling and sustainability. Not every flat-pack item is worth repairing forever, to be fair.
Law, Compliance, Standards, or Best Practice
For most household furniture moves, there is no special legal requirement around dismantling flat-pack furniture itself. The main obligations are practical ones: work safely, avoid creating a hazard, and make sure items are transported in a way that does not put people or property at risk.
If you are hiring help, sensible best practice is to use a provider that is clear about insurance, handling procedures, and service terms. That's where pages such as insurance and safety, health and safety policy, and terms and conditions can be useful reading. They help you understand what is covered, how claims are handled, and what to expect on the day.
For business moves, there may also be internal policies around safe lifting, access routes, and asset handling. Good practice generally includes:
- two-person lifts for bulky panels where needed;
- clear walkways and access routes;
- proper protection for lifts, walls, and floors;
- careful handling of glass, mirrors, and electrical components;
- documentation of any pre-existing damage before move day.
If you're unsure what level of support is appropriate, a company's about us page can give a sense of their experience and working style, while contact us is the place to ask direct questions about difficult items or access issues. That saves surprises later, which is always a good thing.
Options, Methods, or Comparison Table
There are a few different ways to handle flat-pack furniture. The right choice depends on size, condition, distance, and how much risk you're willing to take with the finish. Here's a simple comparison.
| Method | Best for | Pros | Cons |
|---|---|---|---|
| Move assembled | Small, sturdy items with good access | Fast, fewer fixings to lose | Bulkier, harder through doors, higher damage risk |
| Partial dismantling | Wardrobes, beds, or desks with removable sections | Balances speed and safety | Can still be awkward if parts are heavy |
| Full dismantling | Large items, long-distance moves, storage | Easiest to protect and transport | More time, more chance of lost fixings |
| Professional handling | Valuable, large, or complex items | Less stress, better moving coordination | Costs more than doing it yourself |
For many households, partial dismantling is the sweet spot. A bed base comes apart, the wardrobe doors come off, and the rest stays stable enough to move safely. But if the item has already been repaired once or twice, full dismantling may not be wise. Sometimes less is more.
Case Study or Real-World Example
A common real-world scenario is a one-bedroom flat move where the biggest headache is a large wardrobe and a bed frame. The resident has managed the bedroom furniture fine for years, but the staircase in the new place has a tight turn halfway up. A full assembled move would be risky, and trying to "just angle it through" usually ends badly.
In a case like this, the best approach is usually:
- remove all contents first;
- detach doors and shelves;
- photograph hinge positions and cam locks;
- label every panel before lifting it away;
- wrap the longest pieces in blankets;
- load the panels flat but not under pressure;
- rebuild the unit in the room where it will stay.
What makes the difference is not brute strength. It's sequence. The wardrobe may look intimidating at first glance, but once the parts are laid out neatly, it becomes a series of manageable jobs. That's the part people often underestimate.
In busier properties, especially shared houses or compact city flats, there's also the practical issue of timing. Removing a bed at 8am in a quiet room is one thing; doing it while someone else is trying to get to work is another. A little coordination helps everything feel calmer. Not glamorous, but effective.
Practical Checklist
Use this checklist before you start dismantling:
- Clear the space around the furniture
- Take photos from all sides
- Gather tools and labels
- Empty drawers, shelves, and compartments
- Separate glass, mirrors, or fragile items
- Label every panel and hardware bag
- Remove loose parts first
- Keep fixings grouped by section
- Wrap and protect all surfaces
- Store bags, instructions, and photos together
- Check the route before moving the parts
- Rebuild on a flat, stable surface
- Test doors, drawers, and fixings before loading the furniture for use
And one more thing: if anything feels unstable, pause and reset. There is no prize for finishing quickly if you end up with a cracked panel or a wobbly frame. A measured approach is usually the safest one.
Conclusion
Learning How to Dismantle and Reassemble Flat-Pack Furniture Safely is really about slowing the job down just enough to keep control. Take photos, label parts, protect surfaces, move panels carefully, and rebuild with patience. Those small habits make the whole process cleaner, safer, and far less stressful.
If you're moving home, storing furniture, or just trying to get a bulky item through a difficult space, a little planning goes a long way. And if you'd rather not handle the heavy lifting yourself, it can be worth exploring support that fits the job rather than forcing it. Simple, steady, done properly. That's usually the best result.
Get a free quote today and see how much you can save.
Frequently Asked Questions
Do I need to dismantle all flat-pack furniture before moving it?
Not always. Smaller, sturdy items may move safely assembled, but larger pieces like wardrobes, beds, and shelving units often travel better dismantled or partially dismantled. The deciding factor is usually size, access, and how fragile the furniture has become over time.
What is the safest order for taking flat-pack furniture apart?
Start with loose or removable parts such as shelves, drawers, and doors, then move on to the main frame. Keep the structure stable while removing fasteners, and never force panels apart if a hidden screw or cam lock is still engaged.
How do I stop screws and fixings from getting lost?
Use small labelled bags, tubs, or compartments, and keep each furniture section separate. A simple written label works well. Some people like to tape the bag to the matching panel, which is a bit old-school but very effective.
Can I reuse the same screws and fittings when rebuilding?
Usually yes, if they are undamaged and still grip properly. Check for bent threads, stripped heads, or worn cam locks. If any fixing looks questionable, replace it rather than hoping for the best.
What should I do if the furniture starts wobbling after reassembly?
Check that the frame is square, the back panel is fitted correctly, and all fixings are tightened evenly. Wobble often comes from one panel not sitting flush or from a loose connector rather than a major fault.
Is it worth hiring help for flat-pack furniture moves?
It can be, especially for large wardrobes, heavy bed frames, or moves involving stairs and tight access. A service such as man and van can be a practical middle ground if you want transport support without arranging a full removal team.
How long does dismantling and rebuilding usually take?
It varies a lot by item size and complexity. A small desk might take under an hour, while a large wardrobe can take much longer once you include wrapping, loading, unloading, and careful reassembly. Rushing usually adds time, not saves it.
Should I keep the instruction manual?
Yes, if you still have it. The manual often shows the correct order for removing and refitting parts, and it can be a lifesaver when the panel shapes all look nearly the same. If you don't have it, photos become even more important.
What if the particleboard is already damaged?
If the board is swollen, cracked, or stripped around key fixings, dismantling and reassembly may weaken it further. In some cases it's safer to replace the furniture rather than spend time repairing something that may not hold together well.
Can flat-pack furniture be moved in rainy weather?
Yes, but only with proper protection. Wrap panels before they leave the property, keep them off wet ground, and load them quickly into the vehicle. Moisture is not a friend of particleboard, so it's best to minimise exposure.
Do I need special insurance when moving furniture?
If you're doing the move yourself, it's worth checking your home insurance and any hire terms for transport. If you're using a provider, review their insurance cover and handling policies so you understand what is included. The details matter more than people expect.
Where can I ask for a quote or confirm service details?
You can review pricing and quotes and use contact us to ask about awkward items, access problems, or furniture that needs extra care. A quick conversation beforehand usually makes the move much smoother.